Your guide
Open Your guide from the Lodestar menu. It is also what opens from Mods → Lodestar Trail → Config. The screen’s line reads “Choose how Lodestar shows you the way”.
Everything you change shows straight away in the Live preview on the right, but nothing is used in the world until you press Done. Cancel, or Esc, closes the screen and keeps your guide as it was, except for anything you changed in Advanced settings (see More options). The footer reminds you: “Changes show here until you press Done”.
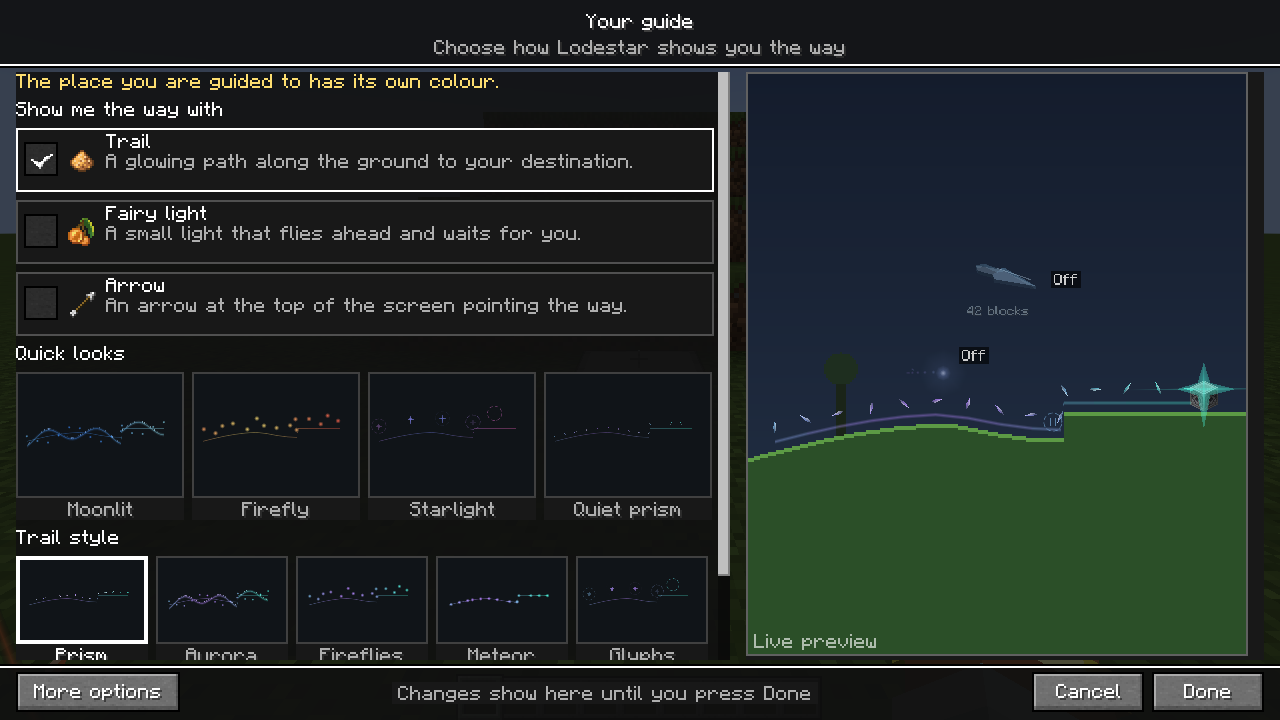
Show me the way with
Section titled “Show me the way with”Three tick cards choose which guides you see. Tick any combination, but at least one: if you try to untick the last one, the screen says “Choose at least one guide”.
| Card | What you see |
|---|---|
| Trail | A glowing path along the ground to your destination. |
| Fairy light | A small light that flies ahead and waits for you. |
| Arrow | An arrow at the top of the screen pointing the way. |
Trail is ticked when you first install Lodestar.
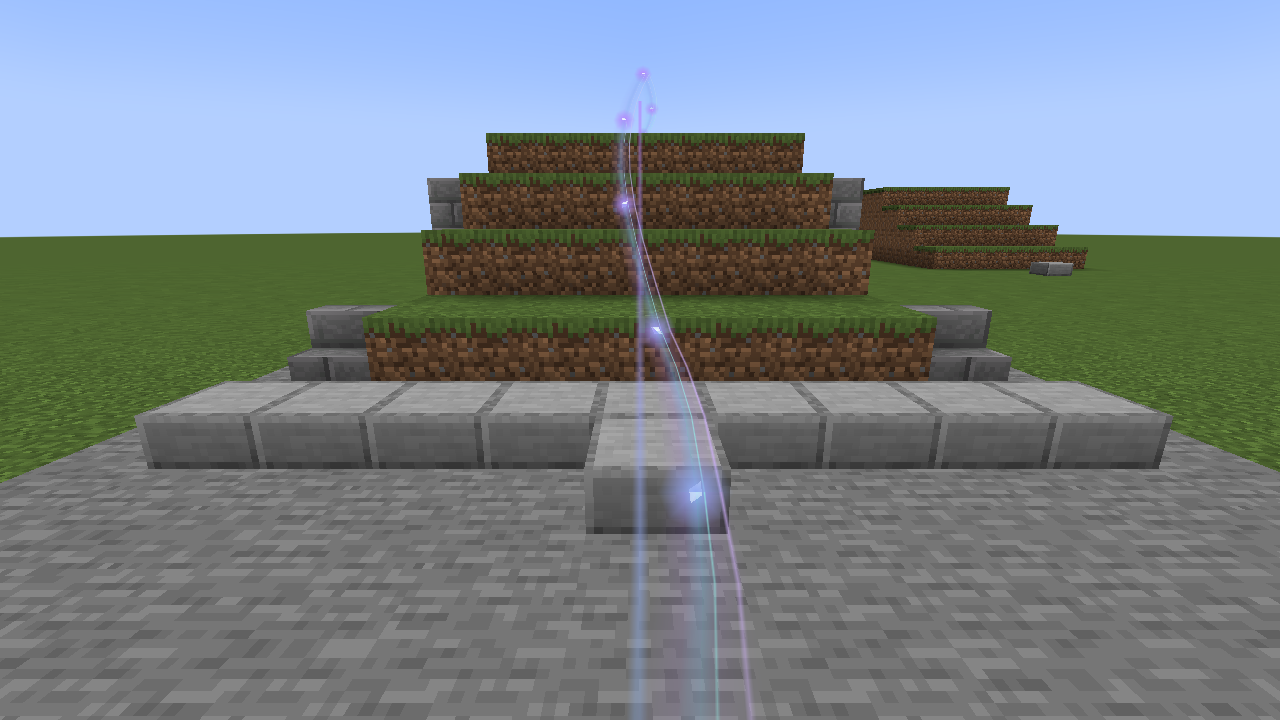
- The trail follows the ground from you toward your destination, over hills and up steps, across the terrain your game has loaded.
- The fairy light is a bright point of light with a sparkling wake and no body. It flies ahead about seven blocks, waits for you, and drifts along beside you if you walk backwards or sideways. It comes closer as you near the destination.
- The arrow turns as you turn and shows the distance in blocks underneath, such as “49 blocks”. When the destination is straight above or below you it says “blocks above” or “blocks below”. It hides while the game’s HUD is hidden (F1) and while a menu is open. Arrow-only guidance is the lightest choice, because Lodestar does not need to look at the terrain.
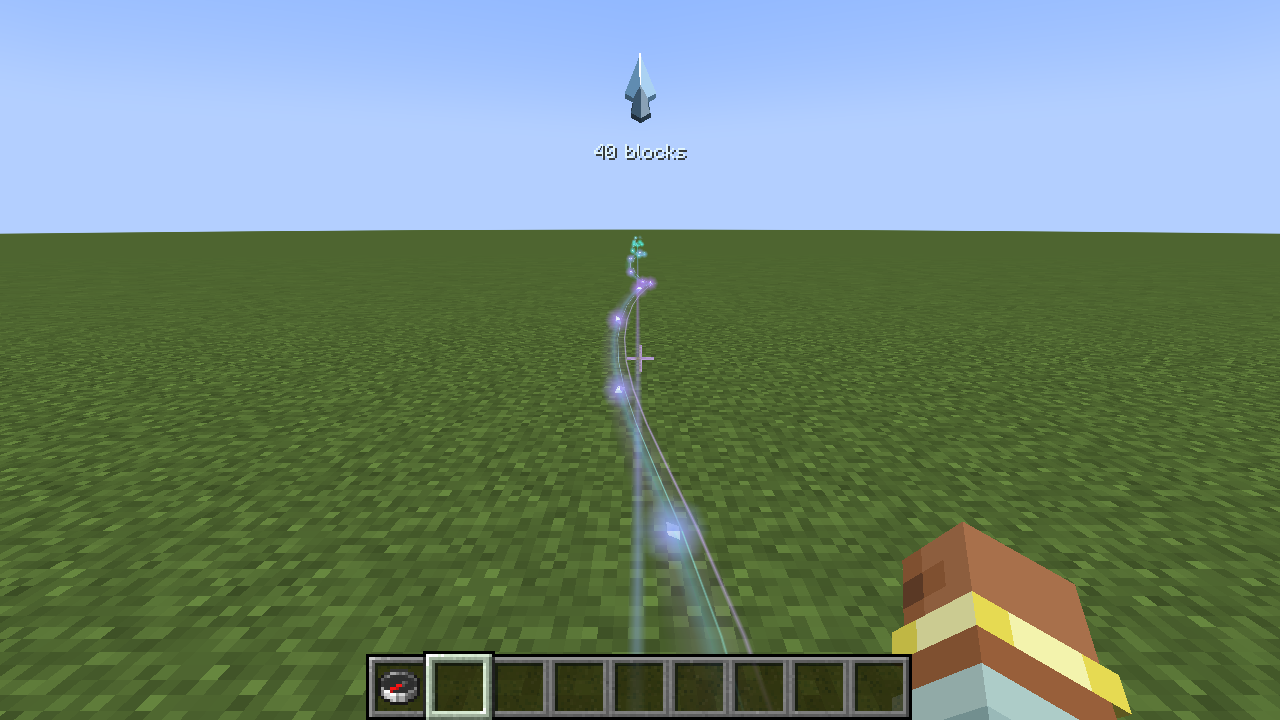
Within about 24 blocks of your destination, the trail and fairy light also show a small star and ring on the ground to mark the exact spot.
Quick looks
Section titled “Quick looks”Four ready-made looks are a fast way to start:
| Quick look | Trail style | Colours |
|---|---|---|
| Moonlit | Aurora | Glacier |
| Firefly | Fireflies | Ember |
| Starlight | Glyphs | Nebula |
| Quiet prism | Prism | Aurora |
Each also sets a size and glow strength. A quick look changes only the trail style, colours, size and glow. Your ticked guides stay as they are, and so do the options under More options. The tile that matches your current choices has a white outline.
Trail style
Section titled “Trail style”Five tiles show each style in miniature. Hover a tile for a short description.
| Style | What you see |
|---|---|
| Prism | Sharp sparkling points: small crystal slivers over a glowing line. Prism is the starting style. |
| Aurora | Soft ribbons of light, with a bright edge and a fine companion strand. |
| Fireflies | Small drifting glows that gather and scatter. |
| Meteor | Streaks that rush ahead in bursts. |
| Glyphs | Floating rune shapes: rings that form a four-point star and dissolve again. |
Colours
Section titled “Colours”Pick a colour tile: Aurora (teal and violet, the starting colours), Nebula (pink and lilac), Glacier (ice and blue), Ember (coral and amber), Rainbow (every colour, always moving) or Custom (your own two colours). The trail, the fairy light and the arrow all share these colours.
Custom colours and the colour wheel
Section titled “Custom colours and the colour wheel”Choose Custom and two colour chips appear: Main and Accent. Press a chip to open the colour wheel below it.
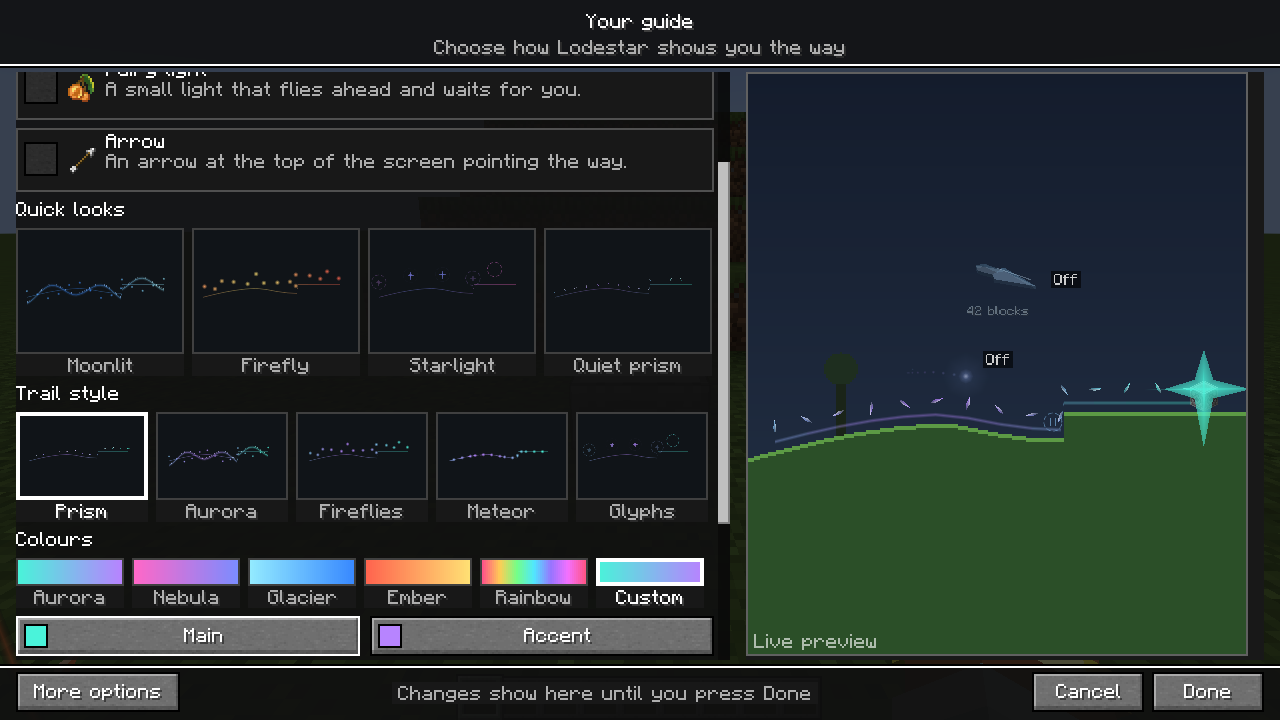
- Drag around the wheel to choose a colour, and toward the middle for a softer one. The bar beside it sets brightness.
- Under the wheel are eight suggested colours, then the colours you used most recently.
- Only one wheel is open at a time. Press the chip again, press Enter, or press Esc to close it.
- With More options on, a Hex colour field appears under the wheel for typing a colour such as
#4AF3DA. While the typed colour is not valid, the field turns red and Done waits until it is fixed. - Keyboard: Tab into the wheel, then use the left and right arrow keys to change the colour, up and down for its strength, and Page Up and Page Down for brightness.
Your custom colours are kept when you try another palette, so choosing Custom again brings them back. The first time you choose Custom, it starts from the palette you had selected so the colours do not jump.
If the place you are being guided to has its own colour, that colour is used in the world instead, and Your guide says “The place you are guided to has its own colour.” Edit the place and choose No colour to use these colours again (Places).
More options
Section titled “More options”Press More options to show these extra controls below the colours:
| Control | What it does |
|---|---|
| Vibrant | Makes the colours brighter and stronger, with a larger glow. |
| Animate colours | Lets the two colours flow along the trail. Rainbow is always animated, so this is greyed out for Rainbow. |
| Size | How big the trail and fairy light are (50% to 150%). |
| Glow strength | How brightly the guides glow (25% to 150%). |
| Arrow size | How big the arrow at the top of the screen is (50% to 200%). |
| Arrival sparkle | Shows a sparkle when you arrive. On to start with. |
| Arrival chime | Plays a soft chime when you arrive. Off to start with. |
| Obstacle warning | Marks the spot where the trail meets a gap or wall with a small split ring. On to start with. |
| Reduced motion | Keeps the guides still instead of moving: the fairy holds steady, decorations and colour cycling stop, and arrival flourishes are skipped. |
Advanced settings, at the end of the list, opens Lodestar’s full settings screen (Settings). That screen saves each change as you make it, so Cancel here does not undo them. This includes the trail’s shape settings, such as following the terrain or the trail’s length, which are not part of this screen’s choices. Look settings you change there join the preview here.
Saved looks
Section titled “Saved looks”Also under More options, Saved looks keeps up to eight looks of your own. Type a Look name and press Save look. Saving with the same name replaces that look. Press a saved look’s name to load it into the preview, or Delete to remove it. Saved looks include your ticked guides and every option on this screen, and are shared by all your worlds.