Places
Places on the Lodestar menu holds the places you have saved and where you have been recently, plus the journey you are planning. It has three tabs: Saved, Recent and Journey.
Each row shows the place’s icon, its colour, its name, and how far away it is with a compass direction, such as “72 blocks SE”. A place in another dimension shows that dimension’s name instead, such as “the Nether”. Long lists are split into pages with ‹ and › buttons below them.
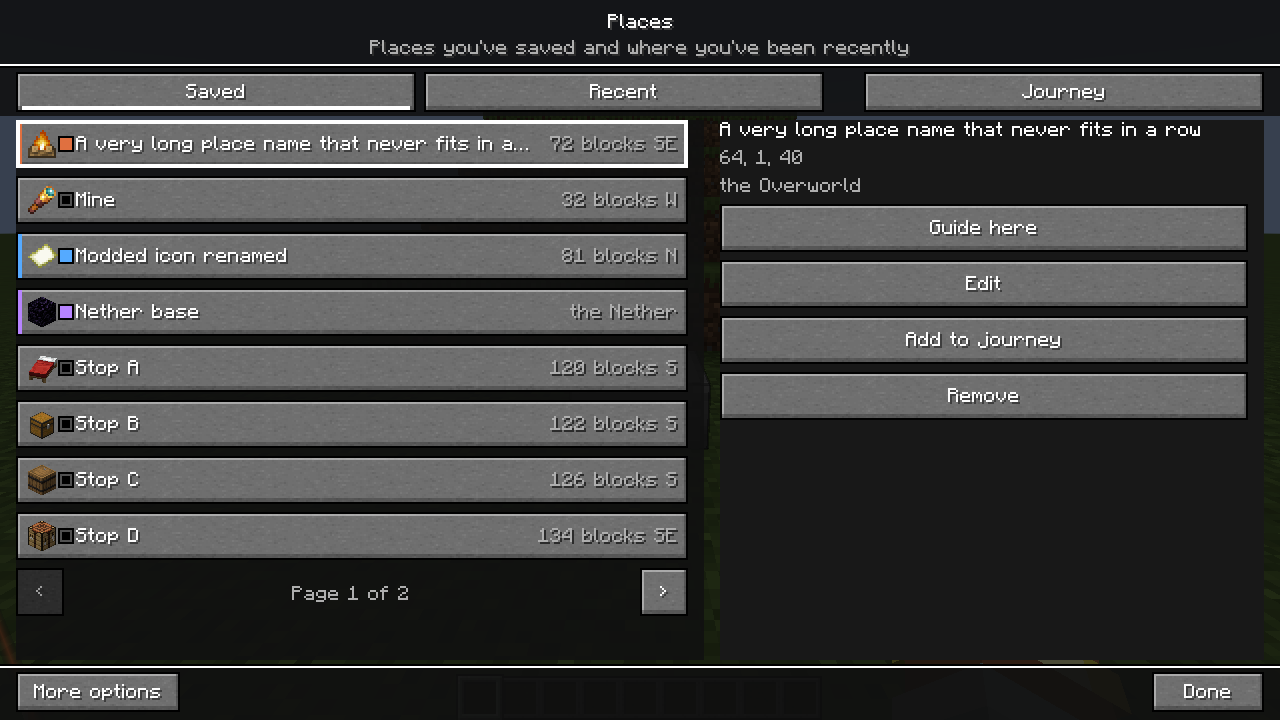
The places you saved with Save this place, up to 32 per world. Select a row to see the place’s coordinates and dimension on the right, with these buttons:
| Button | What it does |
|---|---|
| Guide here | Guides you to this place and closes the screen |
| Edit | Changes this place’s name, colour and icon |
| Add to journey | Adds this place as the last stop of your journey (Journeys) |
| Remove | Removes this place from the list, after asking first |
When Saved is full, Save this place is greyed out and its tooltip says how many places you can keep. Remove one to make room.
Recent
Section titled “Recent”The last five different places you were guided to, newest first, including places chosen from a map mod. Select one to Guide here, Save as a place (which opens the editor so you can name it) or Add to journey.
Journey
Section titled “Journey”The Journey tab lists the stops Lodestar will guide you to in order. See Journeys and share codes.
Saving or editing a place
Section titled “Saving or editing a place”Save this place on the Lodestar menu, Save as a place on Recent and Edit on Saved all open the same editor. A preview at the top shows how the place will look in your lists.
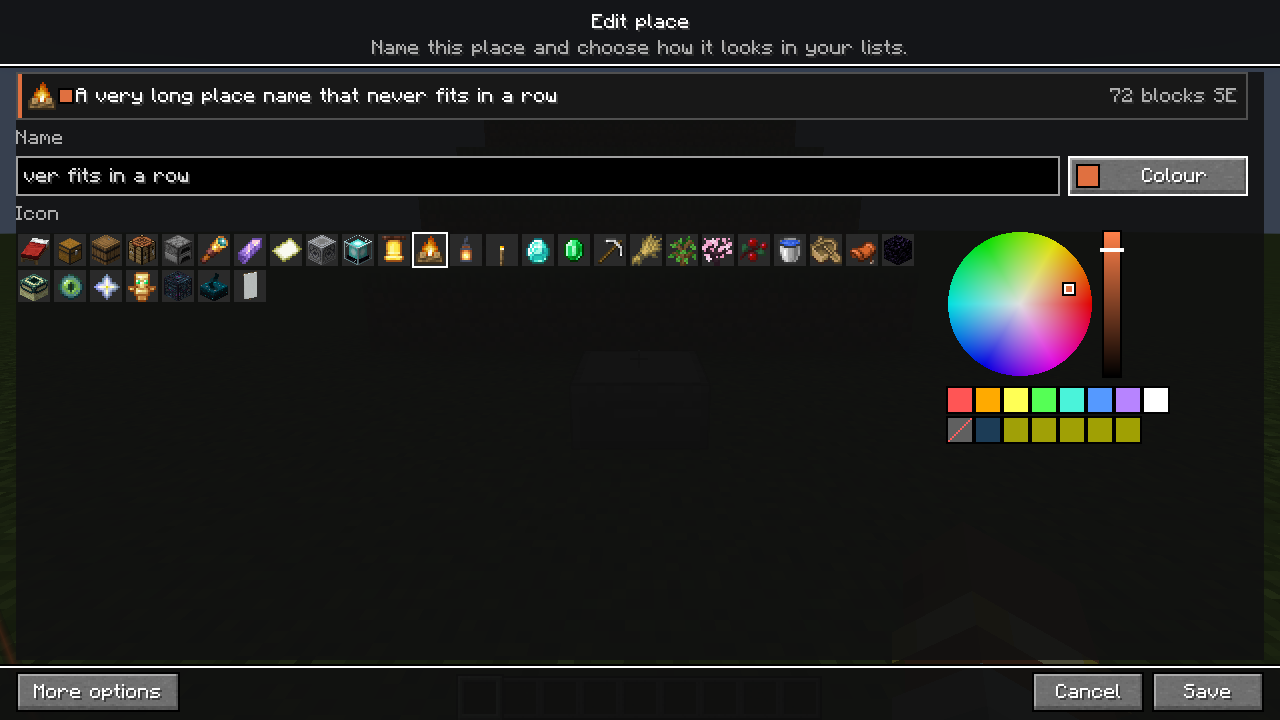
- Name: a new place starts as “New place”. This is the name shown in your lists and while guiding, up to 48 characters. If you leave it empty, the place is named after its coordinates.
- Colour: the chip beside the name shows the place’s colour, or No colour. Press it to open the colour wheel. Choose No colour (the crossed-out swatch) to use your guide’s colours. With More options on, a Hex colour field appears too; leave it empty for no colour.
- Icon: choose one of 32 Minecraft items: red bed, chest, barrel, crafting table, furnace, spyglass, amethyst shard, map, lodestone, beacon, bell, campfire, lantern, torch, diamond, emerald, iron pickaxe, wheat, oak sapling, cherry sapling, sweet berries, water bucket, oak boat, saddle, obsidian, end portal frame, eye of ender, nether star, totem of undying, spawner, sculk sensor and white banner. The arrow keys move around the grid. A new place starts with the map, and Home uses the red bed.
Press Save to keep your changes or Cancel to close without saving. Saving the same spot again updates the place that is already there, and Lodestar says “Updated” with its name.
A place’s colour is used for its row, and for your guide while you are being guided to it. Your guide’s own colours are used for places with No colour.
More options
Section titled “More options”With More options on, each row also shows the place’s coordinates, and the selected place gains Copy share code. This copies a code that lets a friend add this place. They paste it with Import a code (Journeys and share codes).